Prerequisites
Prerequisites
- An Enkryptify workspace with admin access
- An AWS account with permissions to create IAM roles and policies
Permissions
Permissions
Enkryptify connects to your AWS account by assuming an IAM Role that you create. We use temporary credentials from
sts:AssumeRole to manage secrets in AWS Secrets Manager.- Trust relationship:
- Trusted entity: AWS Account
676206939822(Enkryptify) - External ID: not required (will be added in a future update)
- Trusted entity: AWS Account
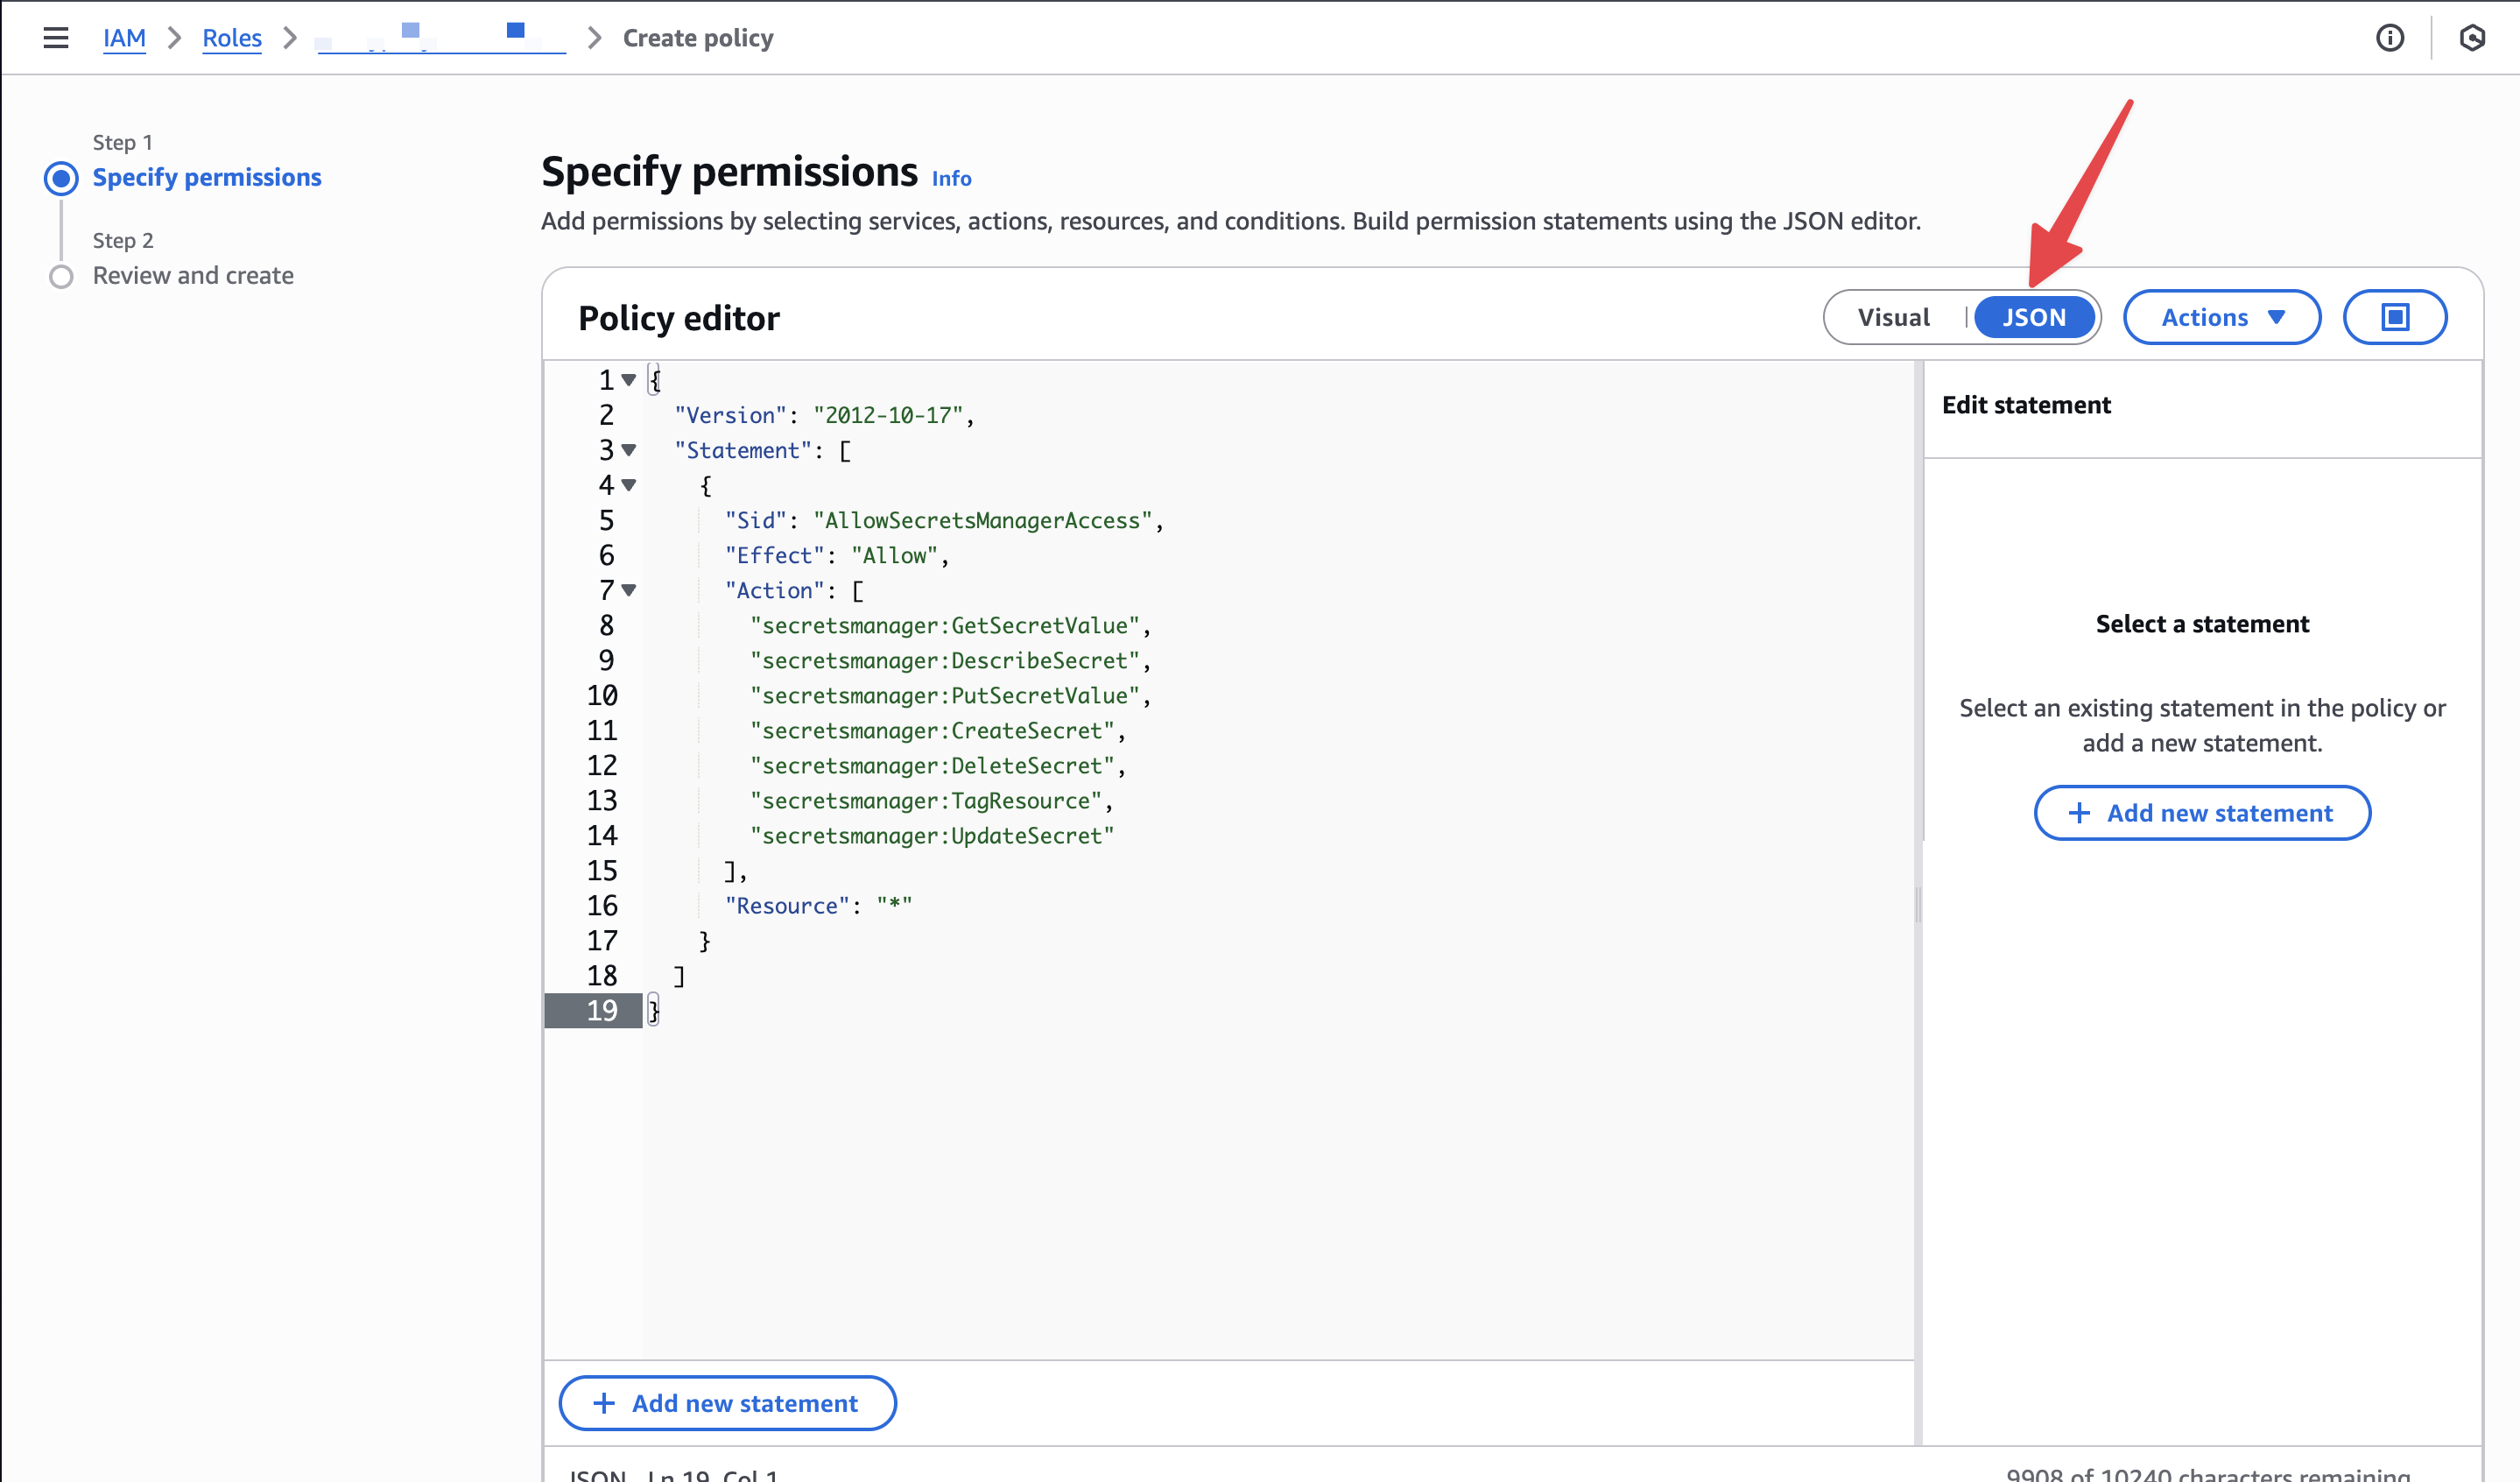
- Required permissions on the assumed role (inline policy example below):
secretsmanager:GetSecretValuesecretsmanager:DescribeSecretsecretsmanager:PutSecretValuesecretsmanager:CreateSecretsecretsmanager:DeleteSecretsecretsmanager:TagResourcesecretsmanager:UpdateSecretsecretsmanager:ListSecrets
You may scope theResourceto specific secret ARNs. The policy above uses*for simplicity.
Steps to complete
Start IAM role creation (trust setup)
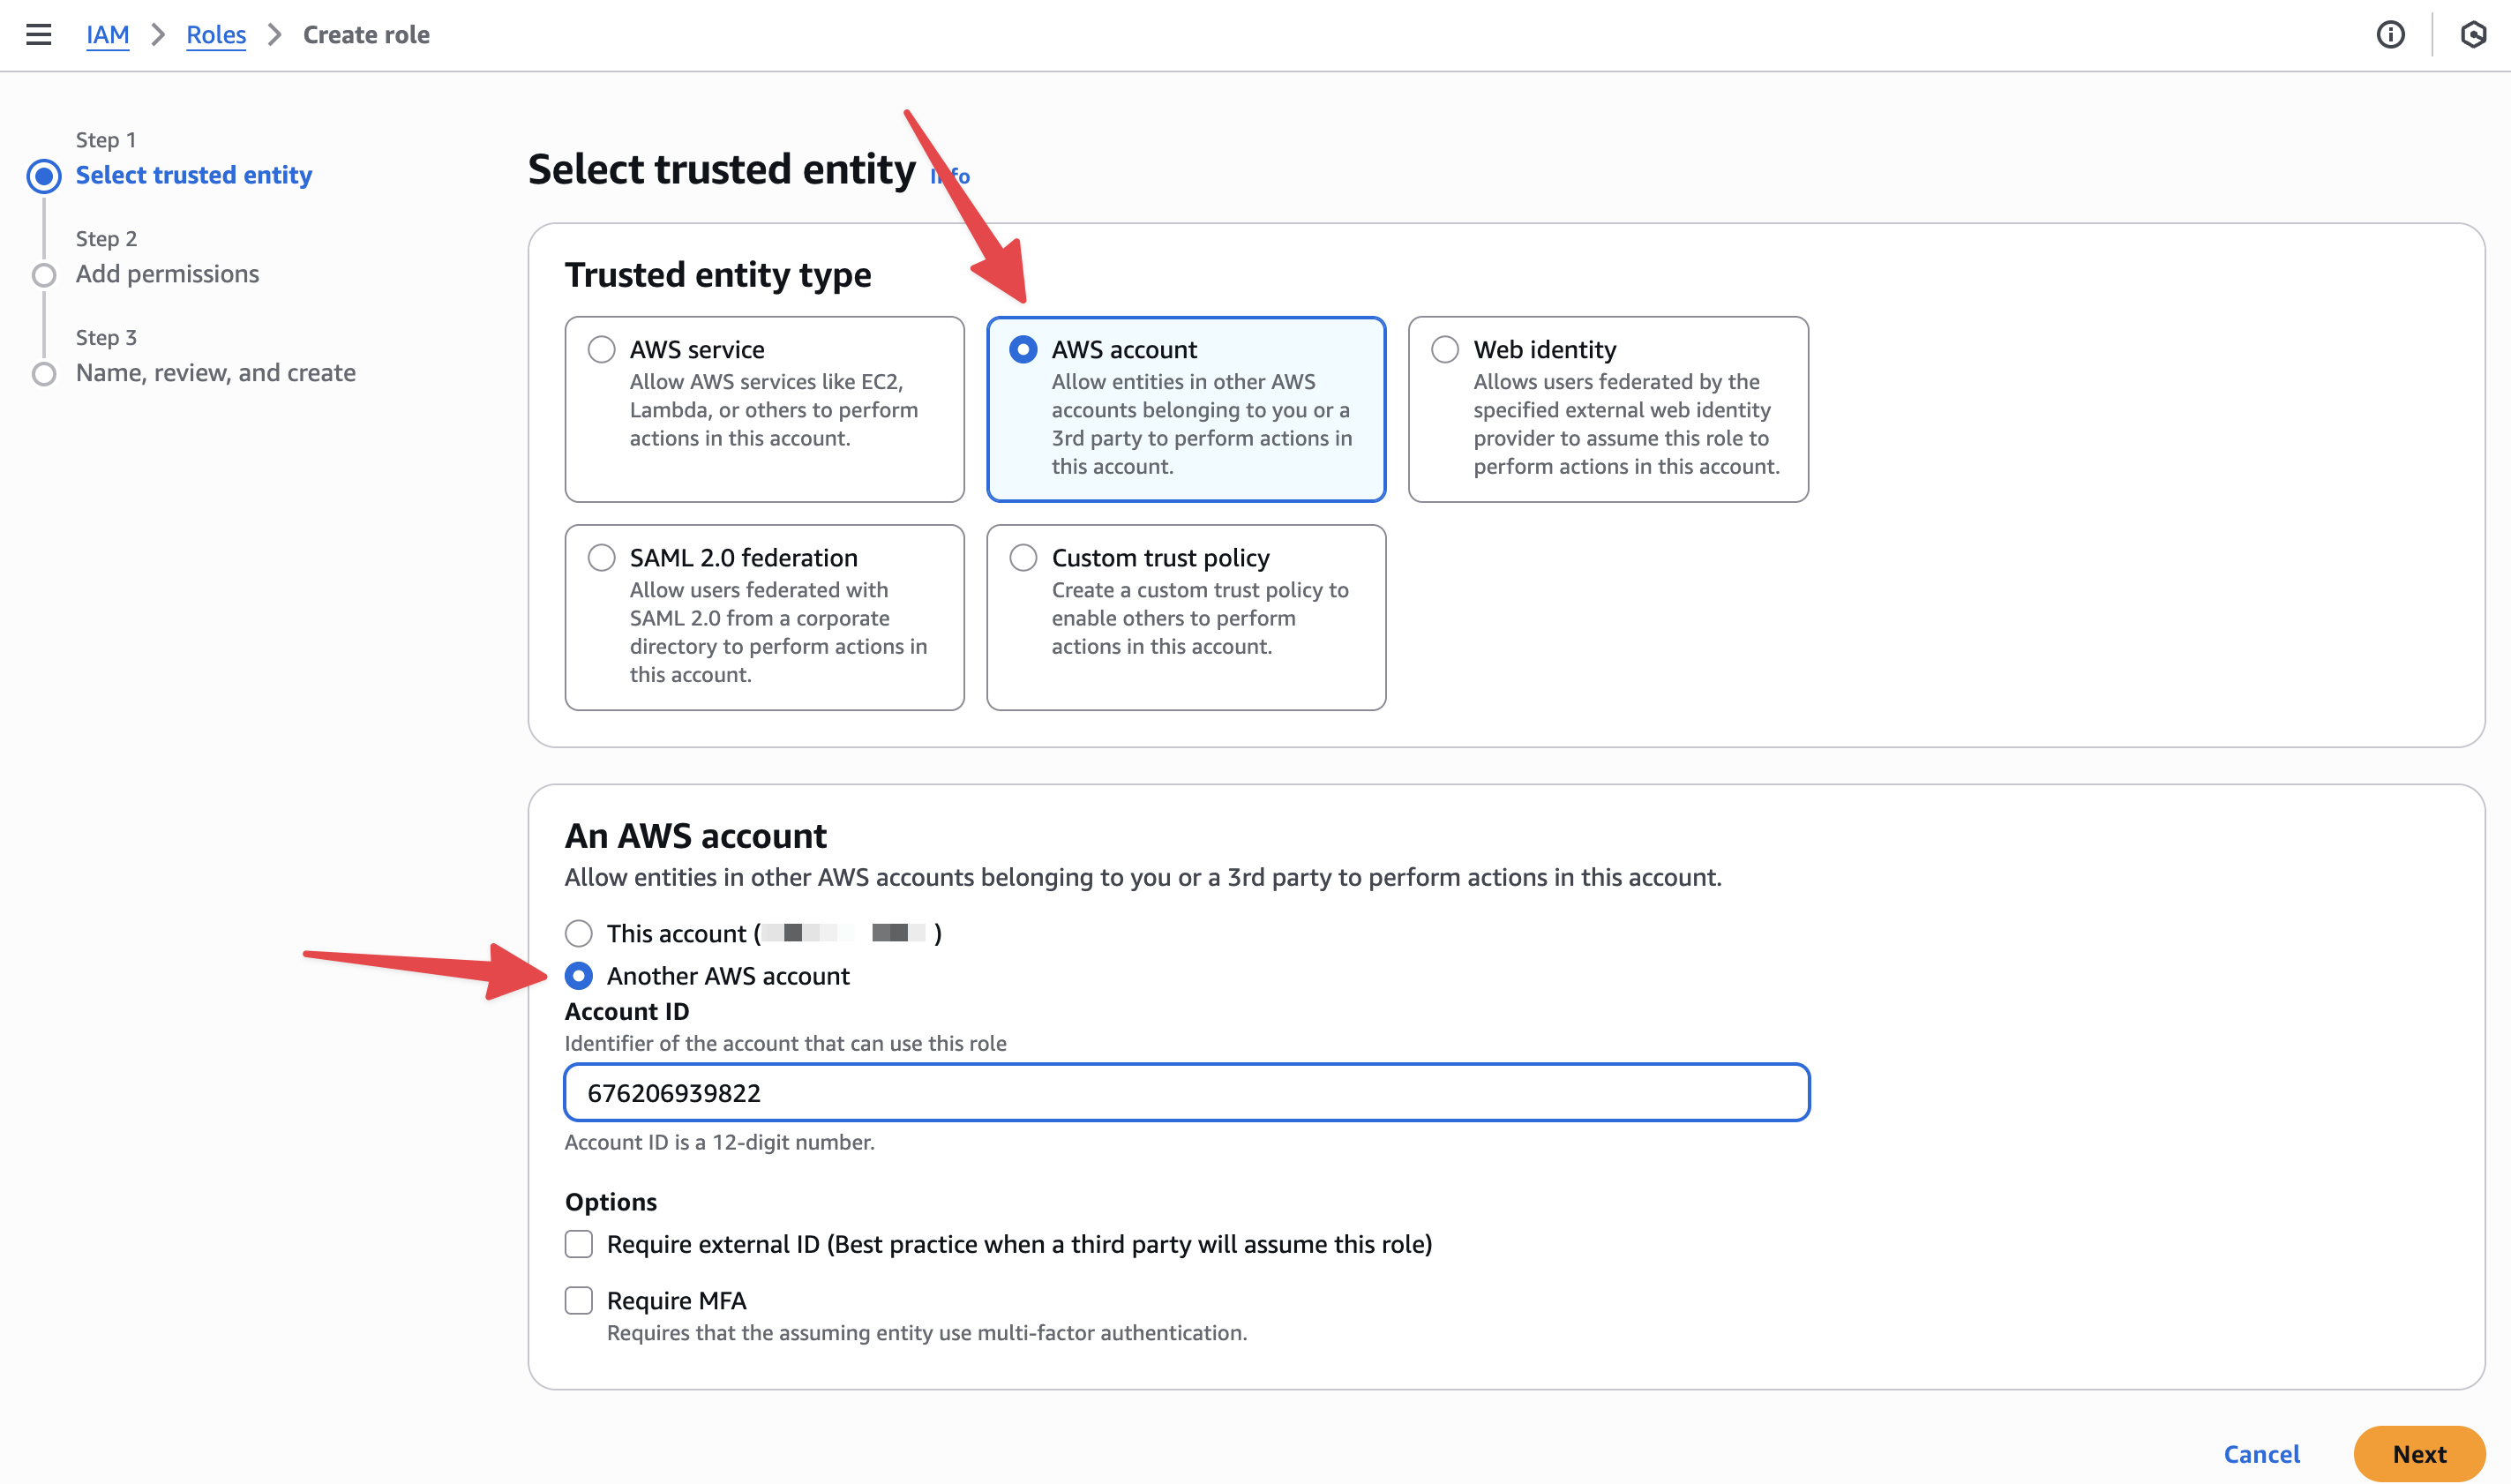
-
In AWS IAM →
Roles→Create role. -
Trusted entity type:
AWS Account→Another AWS Account. -
Enter Account ID
676206939822. -
External ID: not required (will be added in a future update).
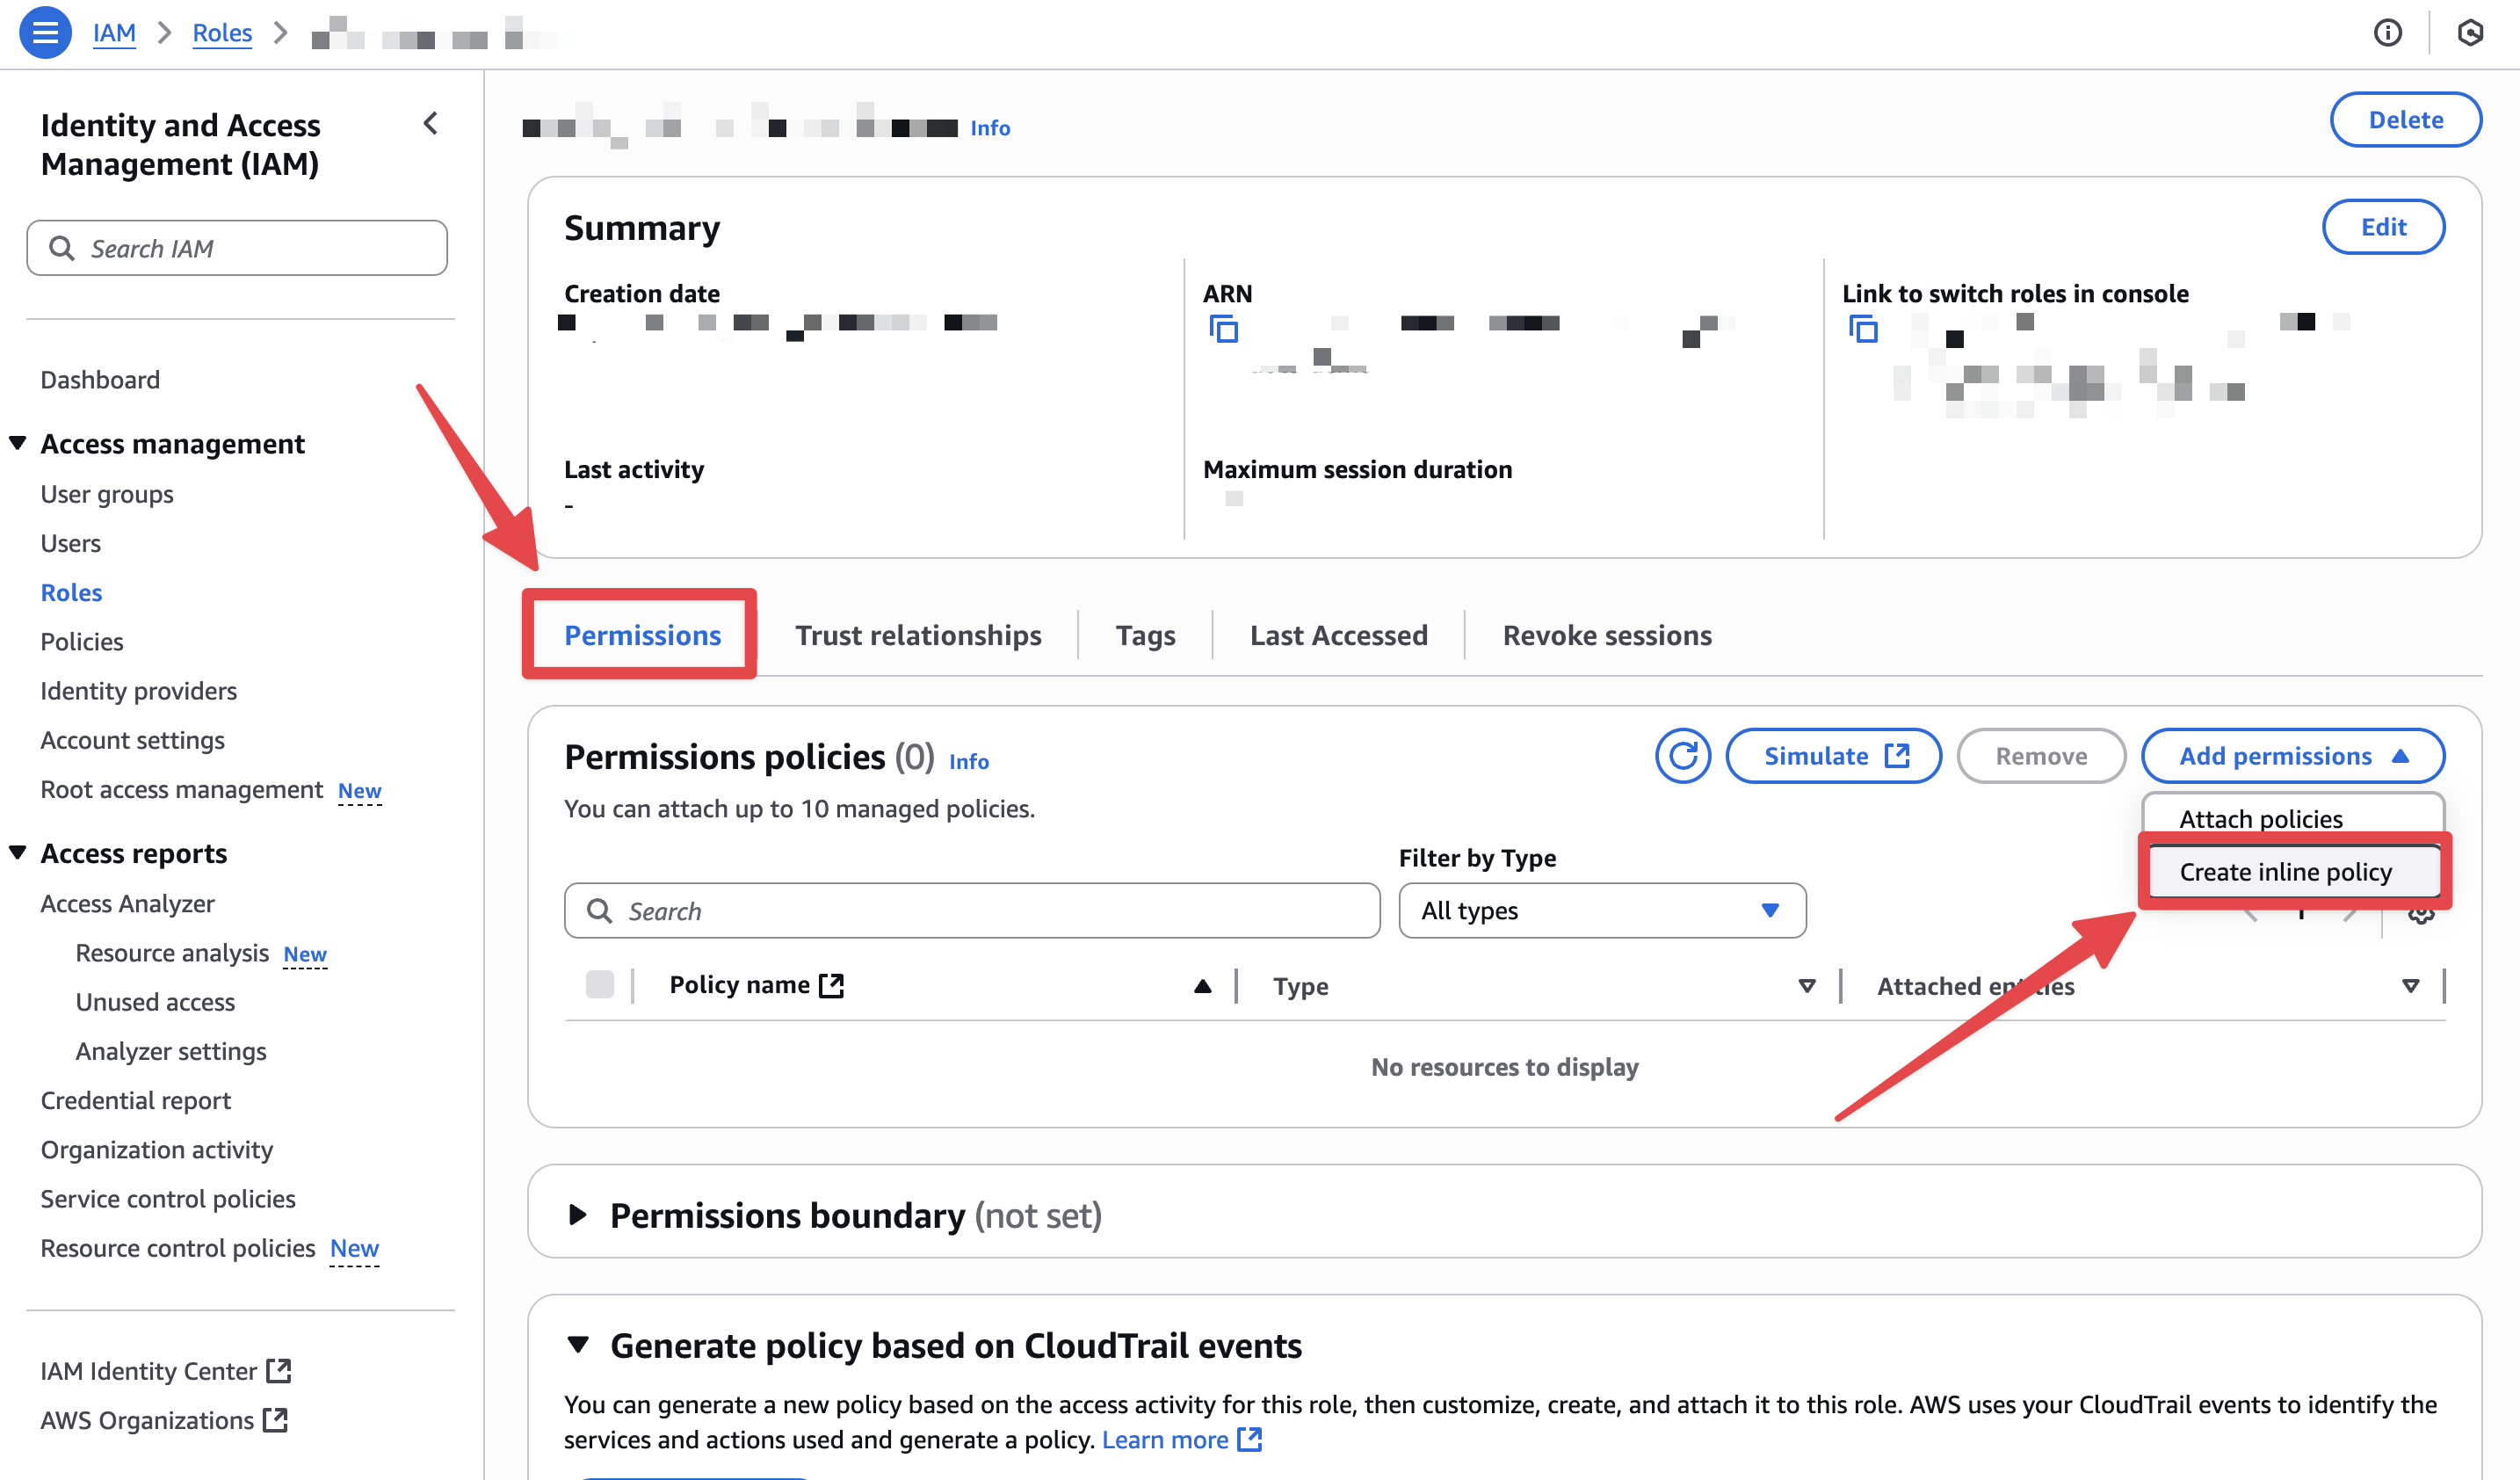
Attach Secrets Manager permissions
- On the role page, go to
Permissions→Add permissions→Create inline policy→JSON, then paste:
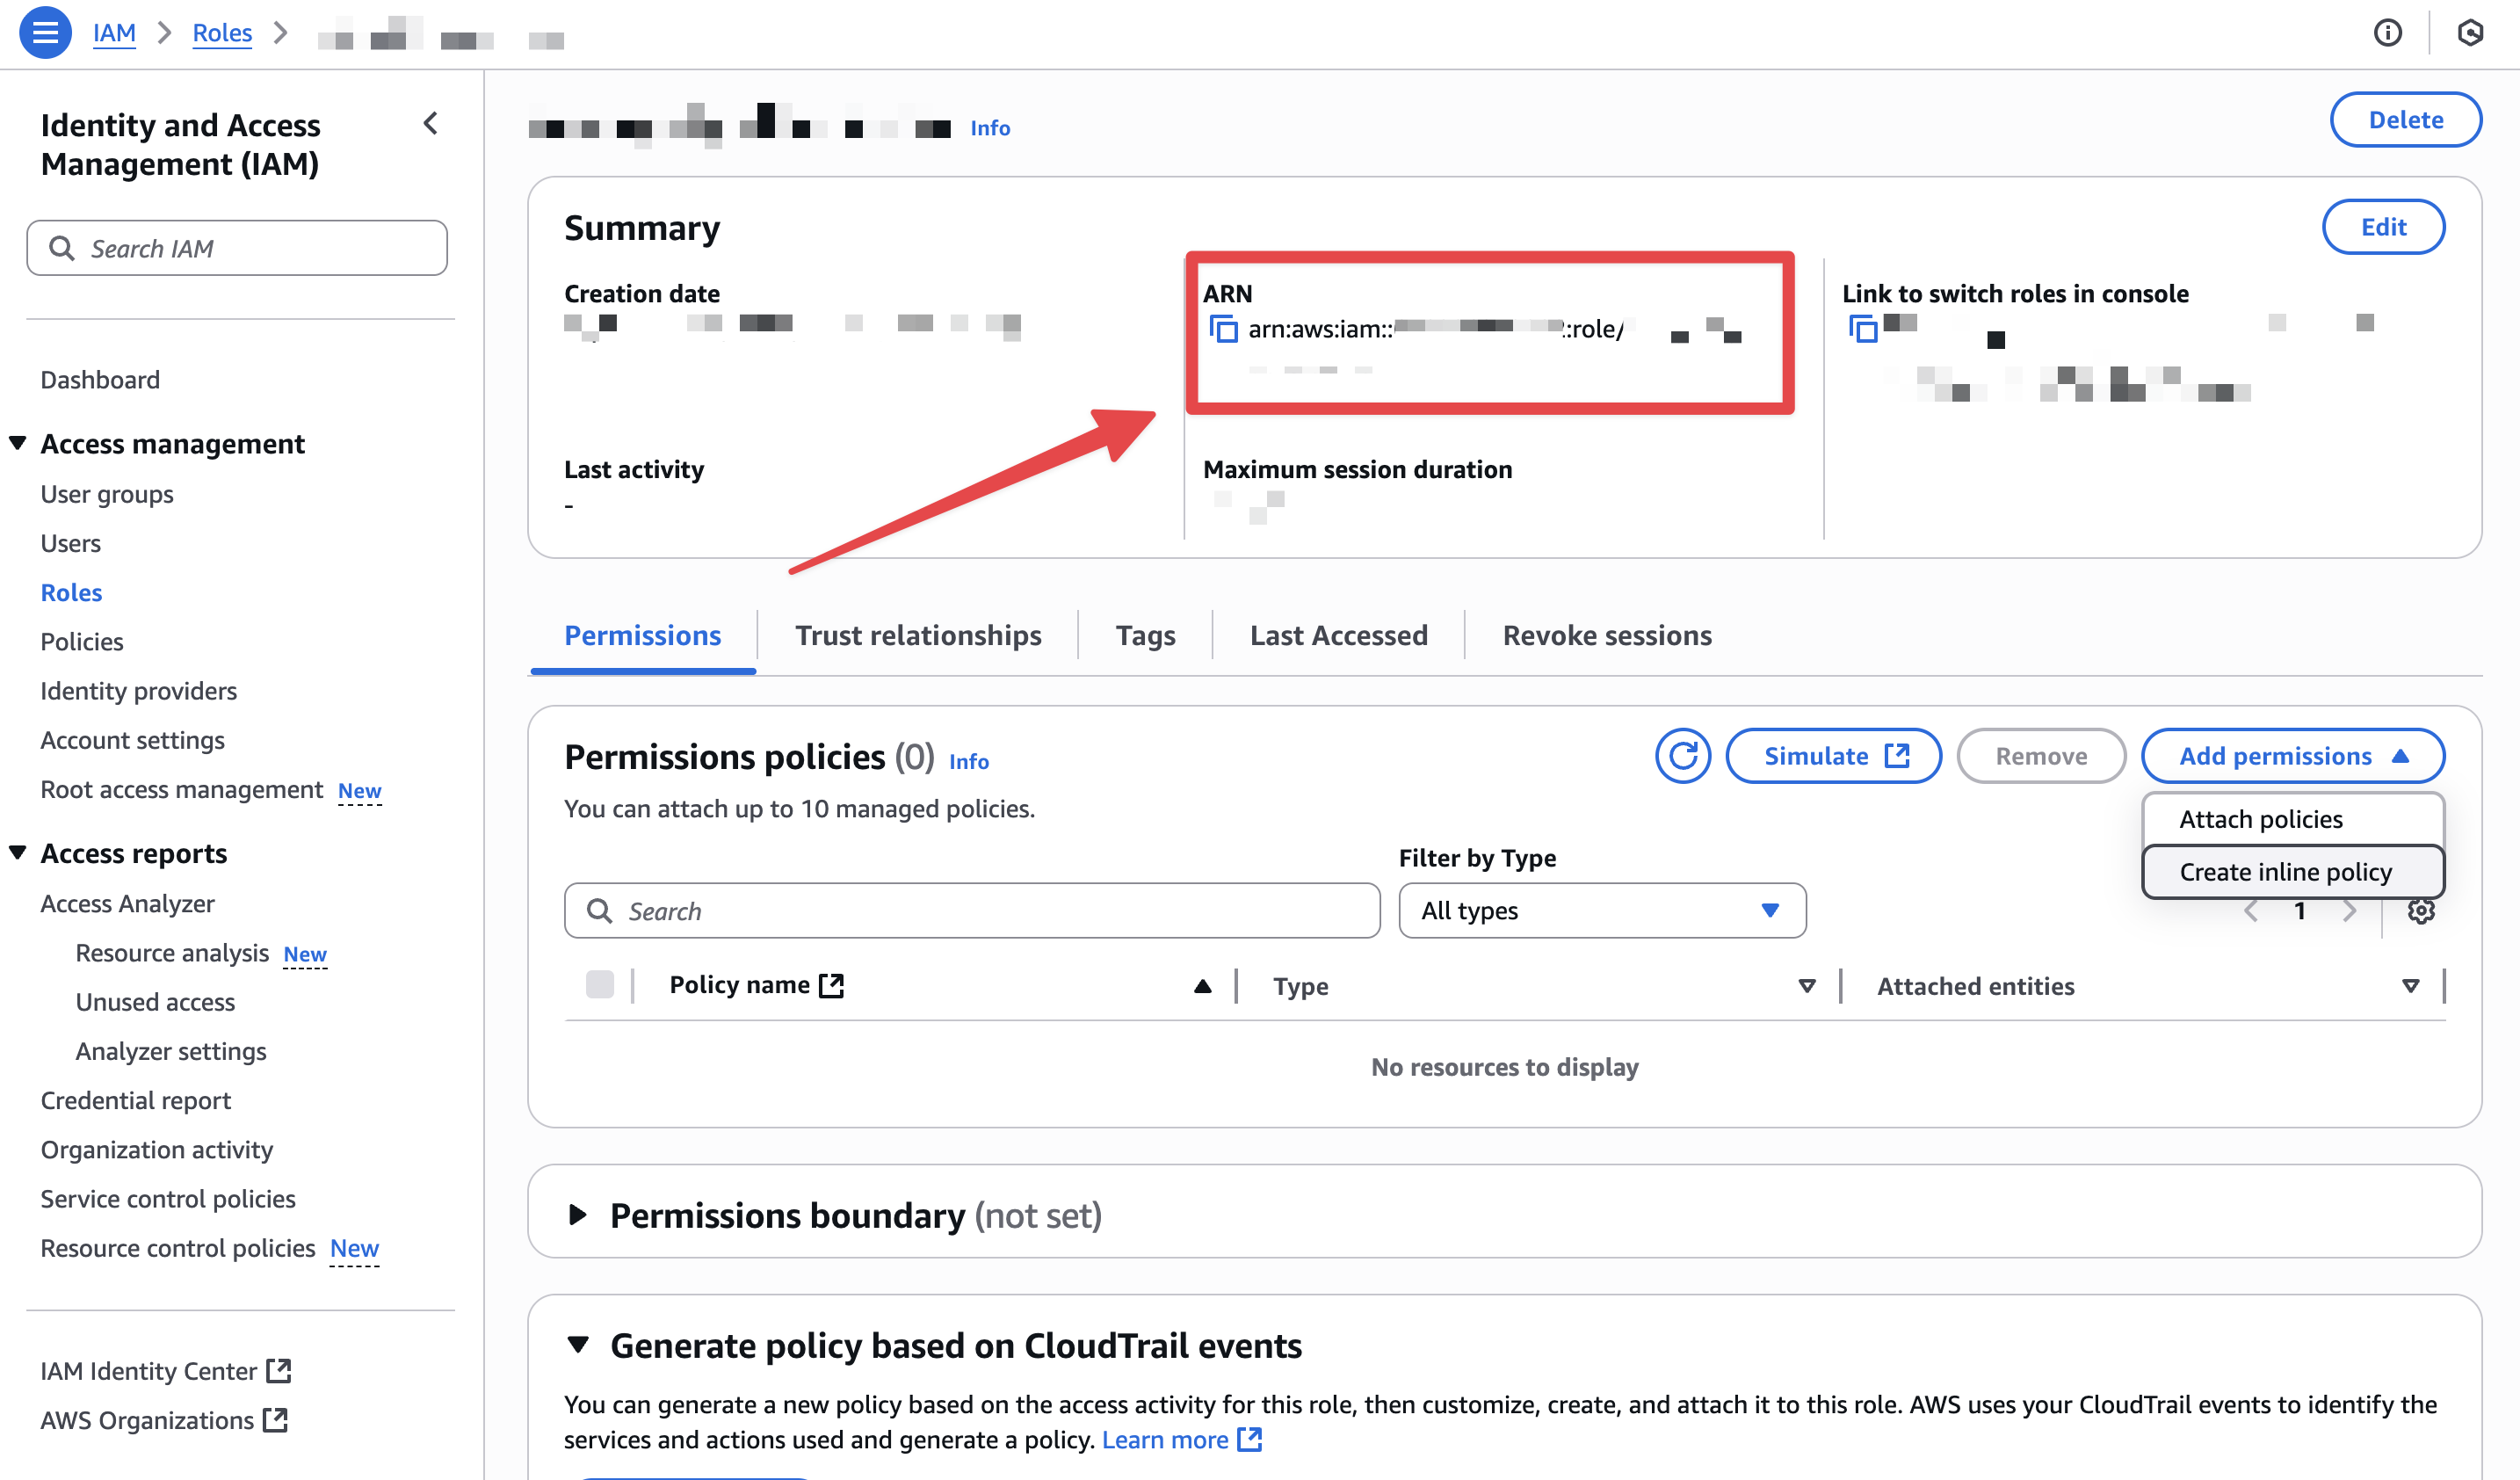
Authenticate in Enkryptify
- Paste the Role ARN into Enkryptify to complete authentication.
- Select the AWS region you want to sync secrets to.